

How to Make an Electric Drift Trike: A Safe Build Guide
Learning how to make an electric drift trike starts with a design decision, not a motor purchase: decide whether you can safely engineer a complete vehicle or should choose a professionally designed electric ride instead. A drift trike combines a steerable front end, a low rear axle, low-traction rear wheels, braking, and an electric power system. Each part affects the others, so a collection of parts that happens to fit together is not automatically a safe vehicle.
Call for a mobility consultation
How to make an electric drift trike safely: start with a complete design
Short answer: Choose a stable, load-rated chassis and compatible steering, wheels, brakes, motor, controller, and battery before assembly. Have a qualified technician review structural and electrical choices, then test the vehicle in a closed, level area at low speed. If you cannot verify a component's rating, fit, or failure behavior, do not ride the trike.
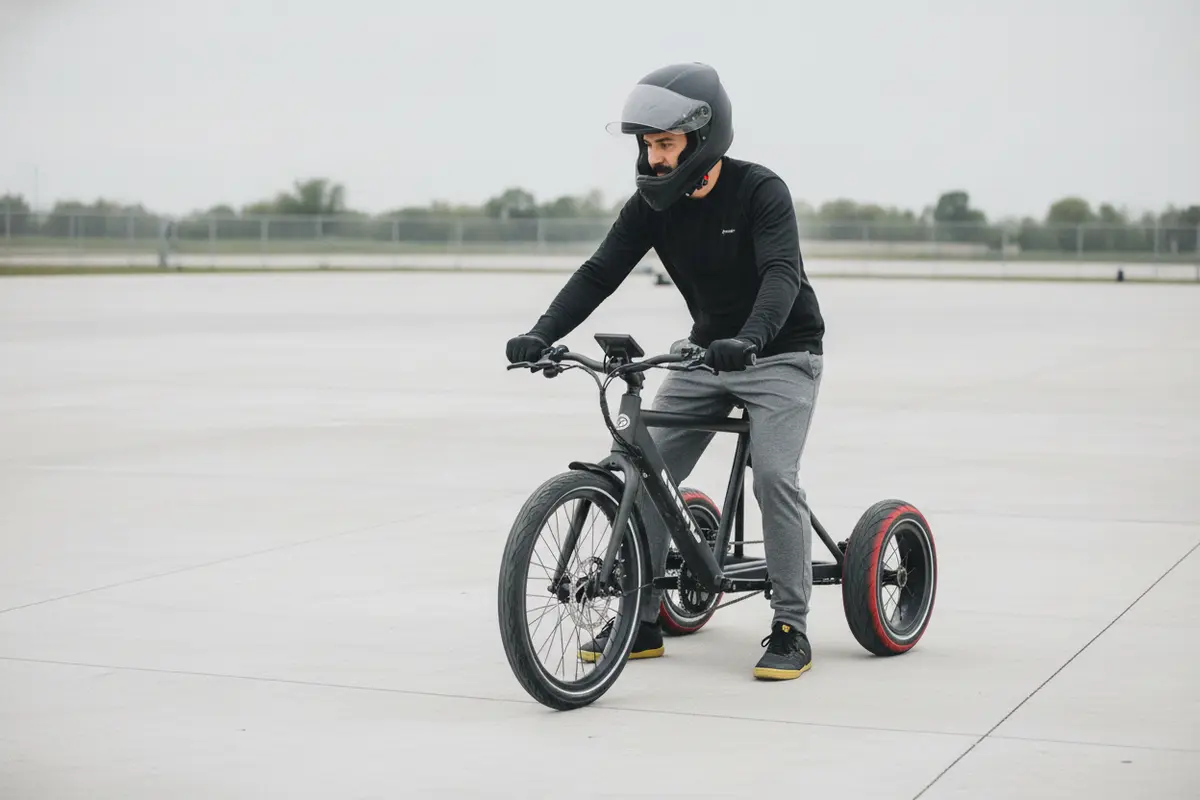
A drift trike is not simply a bicycle with a motor and plastic sleeves on the rear wheels. The rear wheels are intended to slide, which reduces lateral grip and changes how the vehicle corners and stops. Electric torque can make the rear wheels spin quickly, while added battery and motor weight affects balance and handling. A frame, axle, or brake system designed for a different vehicle may not tolerate those loads.
First define the intended use. Is this a slow, controlled project for a private, closed course, or are you seeking a dependable electric vehicle for everyday transportation or trail riding? A drift trike is generally a specialized recreational project, not a substitute for a commuter e-bike or a conventional electric trike. If your priority is reliable local transportation, compare complete vehicles in the electric bicycle collection or discuss the intended route and riding needs with a local electric-mobility shop.
What parts does an electric drift trike need?
A safe design accounts for the whole system. Start with the frame and geometry, then specify wheels and steering, brakes, drive components, electrical protection, rider controls, and safety equipment. Changing one item can require changes elsewhere. For example, more motor torque may place extra demand on the rear axle, tires, frame joints, and braking system.
| System | What to establish before assembly | Why it matters |
|---|---|---|
| Frame and geometry | Load rating, weld and joint condition, wheelbase, seat position, axle support | Controls stability and whether the structure can handle rider and drive loads |
| Front end and steering | Fork, head tube, steering stops, wheel and tire fit, fastener retention | Steering must remain predictable and free of binding or excessive play |
| Rear axle and wheels | Axle strength, bearing support, wheel retention, sleeve fit and clearance | Loose or overloaded rear components can cause sudden loss of control |
| Motor and controller | Matched voltage and current limits, mounting, heat management, throttle behavior | Compatibility affects acceleration, temperature, and electrical reliability |
| Battery and wiring | Battery-management protection, secure enclosure, correct charger, protected cables | Prevents movement, abrasion, short circuits, and charging hazards |
| Brakes and controls | Brake capacity, lever reach, cut-off behavior if applicable, accessible kill switch | Rider needs a dependable way to slow and stop the vehicle |
Use components with documented specifications. Do not assume that a part fits because its dimensions look close or because it is sold for a bicycle. Check the frame, axle, bearings, wheel hubs, fasteners, motor mount, battery, controller, cables, connectors, and braking hardware as a system. Confirm the expected rider weight and operating conditions with the part maker or a qualified builder.

How should you plan the frame, steering, and rear wheels?
The frame is the foundation. Before adapting an existing trike or fabricating a chassis, inspect every load-bearing joint and identify where the rider, motor, battery, and rear axle will attach. A frame intended for a different use may not be designed for the added mass or the twisting forces produced by a powered rear wheel. Weld quality and alignment matter; a frame that looks straight at rest can still flex or track poorly under load.
Steering geometry also deserves attention. The front wheel must turn freely without contacting the frame, cables, or rider, and the steering assembly needs secure bearings and fasteners. Check for play, binding, and interference throughout the full steering range. A seat that is too high or poorly positioned can shift the center of gravity and make it harder to control the vehicle. Do not rely on a quick parking-lot turn as proof that the geometry is sound.
Drift sleeves or low-traction rear wheels should fit securely and rotate without rubbing the frame. They reduce grip by design. That means a trike that slides easily may also be difficult to control on uneven ground, wet pavement, loose gravel, or near obstacles. Do not use improvised coverings that can split, walk off the tire, or interfere with braking. If you are unsure how the rear assembly should be retained, consult an experienced builder rather than improvising a clamp or fastener.
Make a written parts and compatibility list before buying components. Include dimensions, axle and hub interfaces, tire clearance, fastener type, load ratings, and any manufacturer limits. A product page for a wide replacement tire, for instance, is not proof that the tire is suitable for a drift-trike configuration; confirm the intended use and fit rather than adapting by appearance alone.
How do you choose an electric motor and battery?
Pick the power system only after the chassis and intended riding conditions are clear. The motor, controller, battery, and wiring need compatible voltage and current ratings. The motor mount must resist the forces it will see, and the battery must be secured against vibration, impact, heat, and moisture. Avoid choosing a motor solely by a large power number. More power can increase stress on the frame and drivetrain and can make a low-grip rear end harder to manage.
Ask the motor and battery suppliers for specifications and installation requirements. Confirm that the controller is configured for the motor and battery, that the wiring and connectors are rated for the expected current, and that the system has suitable overcurrent and battery-management protection. Keep cables away from moving wheels, sharp edges, hot components, and pinch points. The battery should be housed and retained so it cannot shift during a turn or fall onto the ground.
Use the charger specified for the battery. A charger that connects physically may still be electrically incompatible. Inspect the charger, connector, and battery for damage, and charge in the conditions described by the manufacturer. Do not charge a damaged, swollen, wet, or unusually hot battery. A general-purpose 36-volt e-bike charger listing does not establish compatibility with a DIY battery; verify the exact battery chemistry, voltage, connector, and charging requirements with its manufacturer.
Electrical work is a point where a careful home project can become hazardous. If you lack the training to select protection, make secure connections, and assess battery risks, have the system designed or inspected by a qualified technician. For product-safety information and recall notices, consult the U.S. Consumer Product Safety Commission. Do not treat online build videos as a substitute for component documentation or a professional safety review.
What brakes and safety equipment should you plan?
Braking must be designed for the finished vehicle, not added as an afterthought. Establish how the trike will slow and stop if the rear wheels are sliding, the motor is still producing power, or a control fails. Check brake mounting points, rotor or drum compatibility, cable or hydraulic routing, lever reach, and clearance. Confirm that the brake system is appropriate for the vehicle's actual mass and intended speed. A component sold as a replacement part, such as brake shoes or disc pads, does not by itself verify that a particular build has adequate stopping ability.
Plan an obvious way to stop motor power, and make sure the throttle returns to its off position when released. Keep controls within comfortable reach so the rider does not have to let go of the steering to operate them. Add a securely mounted front and rear light if the vehicle may be used in low light, but do not assume lights make an otherwise unsuitable location safe.
Wear a properly fitted helmet and protective clothing appropriate to the activity. Gloves, sturdy footwear, and protective pads can help reduce exposure to scrapes and impacts, but none makes a high-speed slide risk-free. Keep spectators clear of the test area. Never test a new build around traffic, pedestrians, pets, parked vehicles, or other riders.
What is a careful assembly and test process?
- Document the design. Record the intended rider and use, component specifications, load limits, and assembly instructions. Resolve any mismatch before assembling.
- Inspect and fit the non-powered chassis. Check frame alignment, steering, axle support, bearings, wheel retention, and fasteners. Make sure wheels turn freely and nothing contacts the frame through the steering range.
- Install the drive system according to its maker's instructions. Verify secure motor and battery mounts, cable routing, controller settings, protective devices, and connector fit. Have electrical work reviewed if you are not qualified to assess it.
- Check brakes and rider controls. Confirm that braking is smooth and predictable and that the throttle releases correctly. Test any motor cut-off control while the rear wheels are lifted and secured, following the component instructions.
- Perform a stationary inspection. Recheck fasteners, wiring, wheel clearance, battery retention, steering play, and brake operation. Do not proceed if anything moves, heats unusually, rubs, or behaves inconsistently.
- Use a closed, level test area. Start with a very low-speed test and a prepared spotter. Increase testing gradually only if the vehicle remains controlled and all systems behave as expected. Stop immediately for new vibration, noise, heat, looseness, or control problems.
- Reinspect after each short test. Check the axle, wheels, fasteners, frame joints, cables, battery mount, and brakes. Repeated loosening or damage means the design needs correction, not another ride.
Do not make a first ride the first time the vehicle is tested under load. Separate static checks from low-speed testing, and avoid changing several variables at once. If the trike pulls to one side, has steering wobble, takes too long to stop, or slides unpredictably, stop the project until the cause is understood. A video showing a similar-looking trike cannot establish that your frame, welds, battery, or brakes are safe.
Should you build one or choose a complete electric trike?
A DIY build makes sense only when the builder can evaluate structural design, electrical compatibility, brakes, and local-use requirements, and has the tools and time to inspect the finished vehicle. It can take more than buying a frame and motor: sourcing compatible parts, correcting fit problems, and replacing unsuitable components all add effort. There may also be no single manufacturer responsible for the complete assembly.
A complete electric vehicle is a more sensible starting point when your goal is dependable transportation, an easier ownership experience, or local support. Compare the intended terrain, rider fit, stability, carrying needs, charging setup, and service options. Voltaire Cycles of Central Oregon offers electric mobility products and service in Bend; staff can help discuss whether a purpose-built e-bike or electric trike better matches your needs. A hitch rack base may be useful for transporting certain compatible bikes, but check its vehicle, rack, and load specifications before planning transport for any custom-built trike.
Before riding any homemade powered vehicle, check applicable rules for your location and intended riding area. Requirements can differ by vehicle type and place; do not assume that an electric motor makes a drift trike legal on a public road, path, or trail. Ask the relevant local authority or property owner, and use a permitted closed course if needed.
Talk with a local electric-mobility expert
Frequently asked questions
Can I add an e-bike motor to any trike?
No. A motor conversion changes the loads on the frame, axle, wheels, brakes, and electrical system. Use a chassis and components with documented ratings for the intended configuration, and have uncertain structural or electrical choices reviewed by a qualified professional.
What motor power should I use for an electric drift trike?
There is no universally suitable power rating. Choose a compatible system only after the vehicle's structure, intended use, load limits, and braking capacity are established. Higher output can make a low-traction trike more difficult to control and can put extra stress on components.
Can I test a DIY drift trike on a street or bike path?
Do not assume it is allowed. Rules depend on the vehicle and location, and a sliding recreational trike may be inappropriate for areas shared with traffic, pedestrians, or other riders. Check with the relevant authority or property owner and test only in a suitable closed area.
When should I ask a shop for help?
Ask for help if you cannot verify frame strength, steering alignment, brake capacity, battery and controller compatibility, or safe wiring. A consultation can also help you compare a custom project with a complete electric bike or trike designed for your intended use.
The safest electric drift trike project is one built around verified compatibility, effective braking, careful testing, and a clear understanding of where it can be ridden. If those checks are beyond your tools or experience, choose a complete vehicle and get advice before spending on a custom build.