

Electric Bike Rack for Fat Tire Bikes: Fit Guide
Choosing an electric bike rack for fat tire bikes takes more than checking whether a rack says it holds two bikes. Fat tires, high bike weight, long wheelbases, and battery-powered components can change the fit and loading requirements. The right rack should support the bike at its wheels, clear the frame and fenders, match your vehicle, and stay stable for the whole drive.
Request a rack-fit consultation from Voltaire Cycles
This guide walks through the measurements and decisions that matter before you buy. It is useful for riders in Bend and Central Oregon heading to the trails, as well as online shoppers who need to compare a rack with a particular vehicle and electric bike.
What Should an Electric Bike Rack for Fat Tire Bikes Support?
The rack must support the bike's total loaded weight, tire size, wheelbase, and contact points without pressing on vulnerable parts. A fat tire electric bike may be heavier and wider than a conventional bicycle, so a standard frame-hanging rack is not automatically suitable.
Short answer: The safest starting point is a platform-style rack with wheel trays, enough tire clearance, a stated payload that exceeds your bike's actual weight, and a vehicle connection rated for the combined load.
Begin with the bike, not the rack label. Record the following information for every bike you plan to carry:
- Weight with the battery installed, unless the rack instructions call for removing it.
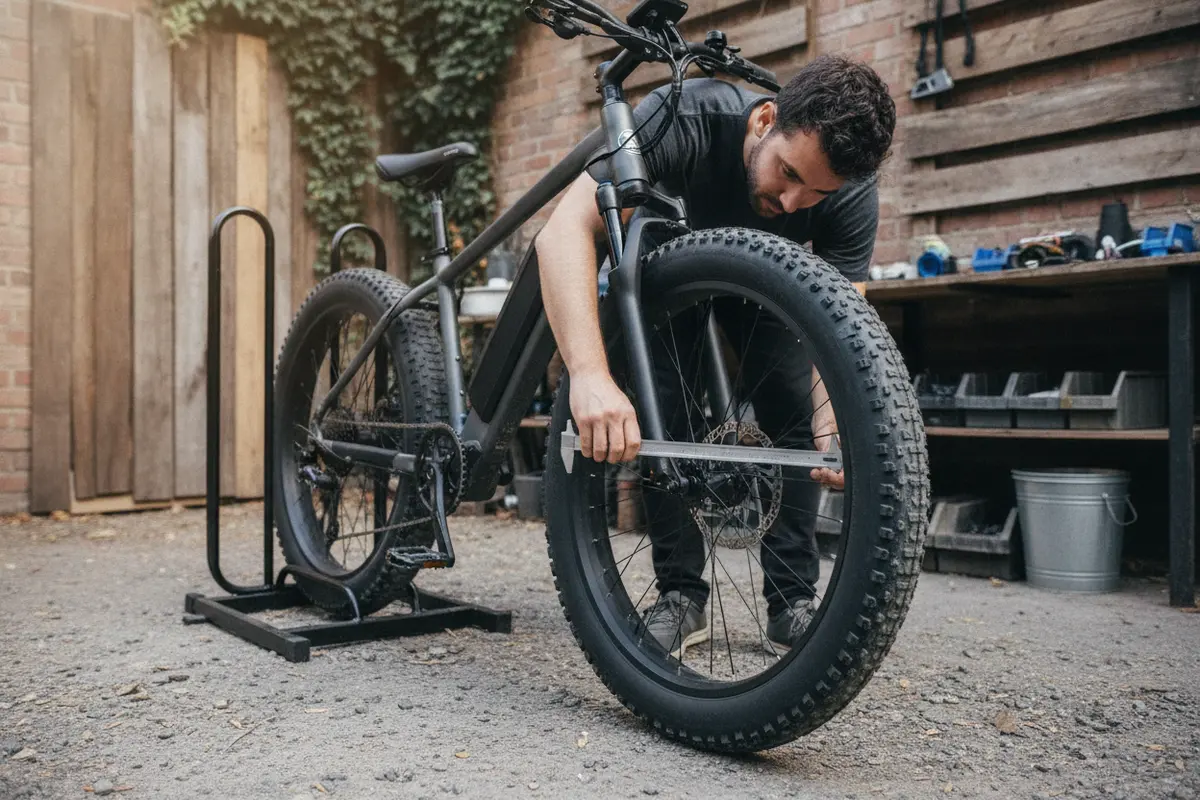
- Tire width, measured at the widest point rather than copied from a model name.
- Wheel size and overall wheelbase, measured from axle to axle.
- Handlebar width and the height of any front or rear fenders.
- Frame shape, especially if you are considering a rack that contacts the frame.
Also check the vehicle's hitch class or receiver rating, the distance from the receiver to the vehicle, and whether the rear hatch or tailgate must remain accessible. If your vehicle has no hitch, do not assume a trunk or roof rack will accommodate a heavy fat tire e-bike.
Make a simple fit sheet before shopping. Put the bike's measured tire width, weight, wheelbase, and fender height in one column, then record the rack's published limits beside them. This makes a close fit visible. It also helps when a household has two different bikes, because the rack must satisfy the larger tire, heavier bike, and longer wheelbase rather than an average of the two.
How Wide Should the Tire Trays Be?
Tire width is one of the most common sources of a poor fit. A tray that accepts a narrow mountain-bike tire may not accept a fat tire without rubbing, stretching, or forcing the wheel into position. Measure the tire and compare that measurement with the rack's usable tray width.
Short answer: Choose a tray that is wider than the measured tire, with enough room for the sidewalls and tread to settle naturally. Do not treat a close nominal fit as proof of compatibility.
Look for these details in the rack specifications:
- Maximum tire width: This should exceed the widest tire you will carry.
- Tray shape: A deep, stable channel is better than a narrow rail for wide tires.
- Wheel support: The wheel should sit fully in the tray rather than balance on its edges.
- Fender clearance: Full fenders may need additional space above the tire or a different retention method.
- Adjustability: Sliding trays and adjustable wheel holders help when bikes have different wheelbases.
Do not rely on a rack being described as universal. Universal often means the rack adjusts across many ordinary bicycle dimensions, not that every fat tire e-bike will fit. A quick measurement can prevent an expensive return and a frustrating loading process.
If you are still choosing the bike, compare current models in Voltaire Cycles' electric bike collection before measuring for a rack. The bike's actual weight, tire width, wheelbase, and fender setup should drive the rack decision, not a product label alone.
How Much Payload Does the Rack and Vehicle Need?
Payload is the combined weight the rack can carry. Add the weight of every bike, then compare the total with the rack's per-bike limit and total limit. The lower limit controls. For example, a rack may have a generous total capacity but a smaller limit for each tray.
Short answer: The rack's capacity must exceed the actual combined bike weight, while the vehicle's hitch and receiver must also be rated for the rack plus bikes. Leave practical margin instead of loading right at the limit.
| What to compare | What to measure | Why it matters |
|---|---|---|
| Bike payload | Weight of each loaded e-bike | Prevents exceeding a tray's individual limit |
| Total rack payload | Combined weight of all bikes | Controls how many bikes can be carried safely |
| Rack and vehicle load | Rack weight plus bikes | Must stay within the hitch and vehicle rating |
| Receiver fit | Receiver size and hitch hardware | Ensures the rack can be installed correctly |
| Rear clearance | Distance to bumper, hatch, and exhaust | Reduces contact, heat, and access problems |
Remove a removable battery only when the bike and rack instructions allow it and when doing so makes the bike easier to lift. A battery can add meaningful weight, but a bike should never be carried in a way that leaves the electrical system, frame, or wheels unsupported. Keep removed batteries secured inside the vehicle according to the manufacturer's guidance.
Government vehicle guidance also illustrates the basic principle: an e-bike should be transported with a vehicle bicycle rack specifically designed for the bike. See the Harrisonburg Police Department vehicle guidance for that rack-use requirement. The exact vehicle and rack limits still come from your vehicle and rack manufacturers.
Think about lifting weight as well as carrying capacity. A rack can meet its published limit and still be impractical if one person cannot safely place the bike on it. Measure the loading height from the ground to the tray. If the bike is difficult to lift, look for a compatible loading ramp, a lower loading position, or help from another person. Never balance a heavy bike against the vehicle while trying to attach a strap.
How Do Wheelbase and Frame Clearance Affect Fit?
Two bikes with the same tire width may not sit the same way on a rack. Wheelbase determines whether both wheels land in the tray and whether the front wheel holder can reach the tire. Measure from the center of the front axle to the center of the rear axle.
Short answer: A rack needs enough tray length and adjustment range for the bike's wheelbase, plus clearance between the frame, pedals, handlebars, vehicle, and neighboring bike.
Frame clearance is especially important with step-through frames, unusual tubes, rear suspension, integrated batteries, and large fenders. Wheel-hold racks are often easier to fit because the retention arm presses on the tire instead of the frame. If a rack uses a frame hook, confirm that the hook can reach a strong, suitable part of the frame without touching cables, displays, paint-sensitive surfaces, or the battery housing.
When carrying two bikes, alternate handlebar positions and check pedal clearance before tightening anything. Leave space between frames and handlebars. A protective layer can help prevent contact, but it does not correct an undersized tray or an overloaded rack.
Do a dry fit before the first trip. Set the empty rack on the vehicle, place the bikes in the trays, and move the wheel holders through their adjustment range. Turn the handlebars as needed and watch for contact with the bumper, hatch, rear window, or the other bike. This test can reveal that the rack technically holds the tires but cannot accommodate the bikes side by side.
Which Vehicle Fit Questions Should You Ask?
Vehicle fit includes more than the receiver opening. The rack must fold, tilt, or swing as intended without striking the bumper. It should also leave adequate room around the exhaust, rear sensors, license plate, taillights, hatch, tailgate, and rear camera.
Short answer: Match the rack to the vehicle's receiver, tongue-weight rating, rear geometry, and access needs. Test the loaded clearance before a long trip.
- Confirm the receiver size and use only the supplied or correctly rated hitch hardware.
- Check the vehicle owner's manual for tongue-weight and towing-related limits.
- Calculate rack weight plus bike weight before loading.
- Measure the distance from the receiver to the closest part of the bike and rack.
- Check whether the loaded rack blocks lights, the plate, sensors, or the rear camera.
- Confirm that the rack's tilt or fold function works with your vehicle and bikes.
Roof racks can avoid some rear-access issues, but lifting a heavy e-bike overhead is difficult and may increase the chance of dropping it. Trunk racks can have frame, strap, and weight limitations. For many heavy fat tire e-bikes, a properly rated hitch platform is the simplest place to start, but the vehicle-specific fit must still be verified.
For broader transport planning, compare this fit process with Voltaire Cycles' guides to heavy e-bike car racks and electric bike hitch-rack setup. Those resources can help you frame the vehicle-side questions, while the rack manufacturer's current instructions decide final compatibility.
Pay attention to the rear of the vehicle after the rack is loaded. A rack may be secure but still hide a taillight or license plate, interfere with a backup sensor, or place a tire close to a hot exhaust outlet. If access is important, confirm that the tilt or swing feature can be operated with the bikes attached and that the loaded weight does not exceed the mechanism's limit.
How Do You Load and Secure Fat Tire Electric Bikes?
Loading should be controlled and repeatable. Park on level ground, set the rack in its loading position, and keep the bike's battery and display protected from impact. Use a ramp only if the rack is designed for one and the ramp is secured as directed.
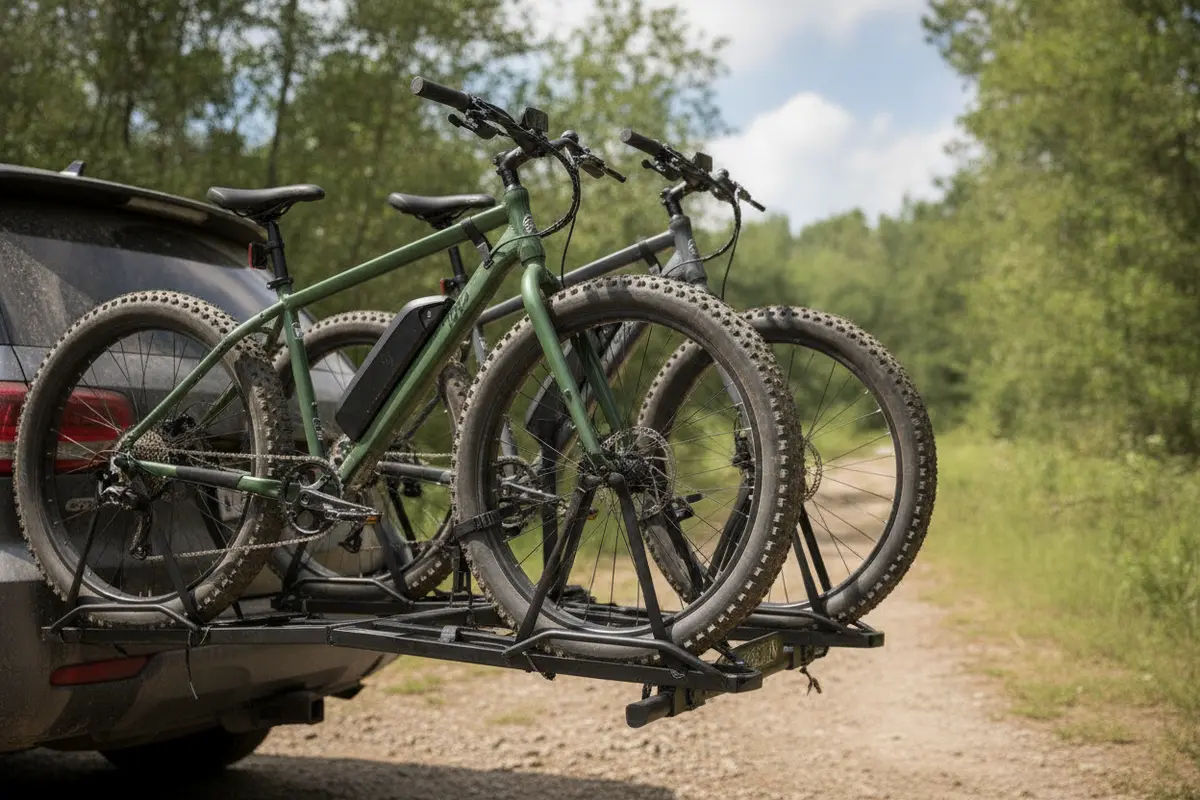
Short answer: Place the heaviest bike closest to the vehicle, center each wheel in its tray, engage the retention system fully, and check every contact point before driving.
- Inspect the rack, hitch pin, trays, straps, arms, and wheel holders for damage.
- Place the rack fully into the receiver and confirm it cannot move excessively.
- Load the first bike in the position specified by the rack maker, usually the position closest to the vehicle.
- Center both wheels in the trays and keep the handlebars clear of the vehicle.
- Secure the wheels and frame or tire retention points without crushing the tire.
- Load the second bike only after checking that its handlebar, pedals, and frame clear the first bike.
- Apply locks after the bikes are stable; never use a cable lock as the primary retention system.
- Drive a short distance, stop, and recheck straps, wheel holders, and clearances.
Do not depend on the rack's built-in lock to prevent all movement or theft. A lock can discourage opportunistic theft, but it may not secure every removable wheel or accessory. For a longer stop, use a robust secondary lock and avoid leaving the bikes unattended for extended periods.
How Can You Check Rack Security Before and During a Trip?
Security has two parts: keeping the bikes attached to the vehicle and reducing theft risk when parked. Before departure, pull and push each bike gently to find unexpected movement. Movement in the rack's designed tilt mechanism is different from a loose hitch connection, loose tray, or unsecured wheel.
Short answer: Recheck the rack after the first few miles and at every stop. Use a secondary lock, remove valuable accessories when practical, and park where the loaded bikes are visible.
Keep the following checks in your routine:
- Verify the hitch pin and anti-wobble hardware are tight.
- Check that every wheel strap or retention arm is engaged.
- Confirm no cable, strap, or lock can reach the tire or exhaust.
- Make sure lights and the license plate remain visible or are supplemented as required.
- Inspect after rough roads, heavy wind, or a stop where the rack was folded or tilted.
Weather also affects the pre-trip check. Rain, dust, and road spray can make straps harder to inspect and may collect around wheel holders. Wipe contact points clean and look for frayed webbing, cracked plastic, bent metal, or missing hardware before loading. If anything looks damaged, do not improvise a repair with rope or an unapproved strap; follow the rack maker's instructions or have the rack inspected.
For a rack consultation, bring the bike's weight, tire measurement, wheelbase, vehicle year and model, receiver size, and photos of the rear of the vehicle. Those details make it easier to identify fit questions before you purchase.
Talk with Voltaire Cycles about your electric bike rack fit
Frequently Asked Questions
Can any bike rack carry a fat tire electric bike?
No. The rack must accept the tire width, support the bike's weight, accommodate its wheelbase, and fit the vehicle receiver. A conventional rack may lack the tray width or payload needed for a fat tire e-bike.
Should I remove the battery before transporting an electric bike?
Follow the bike and rack instructions. Removing a battery can reduce lifting weight, but it does not replace a correctly rated rack or secure wheel support. Store a removed battery safely inside the vehicle according to its manufacturer's instructions.
Is a hitch rack better than a roof rack for a heavy e-bike?
A hitch rack can reduce the need to lift a heavy bike overhead, but neither style is automatically better. Compare payload, vehicle clearance, receiver or roof limits, loading height, and access to the rear of the vehicle.
Can I use a rack with full fenders?
Possibly, if the wheel trays and retention system leave enough space for the fenders. Measure the tire and fender together, then verify the rack's instructions. Never force a retention arm against a fender or delicate component.
Voltaire Cycles of Central Oregon can help you think through electric mobility equipment, vehicle fit, loading, and service needs from the Bend showroom, with online options for customers beyond Central Oregon. The right measurements make every trip to the trailhead easier and more secure.