

Electric Bike Brake Pad Replacement Guide
Electric bike brake pad replacement is a safety decision, not just a routine upgrade. The added weight of a battery and motor, frequent stops, hills, cargo, and trail riding can all increase the work your brakes do. If the lever feels different, stopping takes longer, or the pads look thin or contaminated, park the bike and inspect it before your next ride.
This guide explains what to look for, how to match replacement pads, which steps a confident home mechanic may handle, and when to bring the bike to a qualified technician. The goal is not to make every repair a do-it-yourself project. It is to help you make a sound decision before worn pads damage a rotor or reduce control.
Schedule electric bike brake service with Voltaire Cycles in Bend.
Before touching the brake system, switch the e-bike off, remove the battery when the manufacturer's procedure allows it, and support the bike securely. Never test a repaired brake in traffic. Use a quiet, low-risk area and confirm that both brakes work before returning to normal riding.
How do you know when electric bike brake pads need replacement?
Replace electric bike brake pads when the friction material is critically thin, damaged, oily, glazed, unevenly worn, or paired with unsafe braking symptoms. A longer stopping distance, soft lever, grinding noise, repeated squealing, or visible rotor contact can also signal that the bike should be parked for inspection.
Do not rely on a calendar or a single mileage number. Brake pad life depends on rider weight, bike weight, speed, terrain, weather, cargo, braking habits, and pad material. A commuter who rides flat pavement may have a different replacement interval from a Bend rider who descends hills or carries equipment.
- Thin friction material: Inspect the pad through the caliper or remove the wheel only if you know the correct procedure. If little material remains above the backing plate, replacement is due.
- Uneven wear: One pad may be much thinner than the other when the caliper is misaligned, the pistons are not moving evenly, or the rotor is not centered.
- Contamination: Oil, chain lubricant, cleaner, or greasy fingerprints on the friction surface can reduce braking. Oily pads usually need replacement rather than a quick wipe.
- Glazing or heat damage: A shiny, hardened surface can reduce friction and create noise. Discoloration, cracking, or a burnt smell deserves a professional inspection.
- Noise and feel changes: Light noise can have several causes, but grinding, pulsing, scraping, or a lever that pulls unusually close to the handlebar should not be ignored.
A visual check is useful, but it cannot confirm every brake problem. A worn rotor, air in a hydraulic line, a stretched mechanical cable, a loose caliper, or a damaged mount can feel similar to worn pads. If the symptom affects stopping control, do not keep riding while waiting for the noise to get worse.
What should you check before ordering replacement brake pads?
Identify the brake caliper, pad shape, pad retention system, and rotor requirements before ordering. Electric bike brake pads are not universal. The correct replacement must fit the caliper and match the manufacturer's specifications, while the pad compound should suit your riding, weather, weight, and braking demands.
Start with the e-bike owner's manual and the markings on the brake caliper. Take a clear photo before removing anything. Record the bike make, model, brake brand, caliper model, front or rear position, and whether the system is hydraulic or mechanical. If the label is hidden or unreadable, a technician can identify the part from the complete bike.
| What to identify | Why it matters | Safe way to confirm |
|---|---|---|
| Caliper and brake model | Determines the pad shape and retention hardware | Read the caliper marking or consult the model manual |
| Front or rear position | Some bikes use different systems or pad shapes at each wheel | Match the pad to the exact caliper, not only the bike brand |
| Hydraulic or mechanical system | Changes adjustment, piston, cable, and bleeding requirements | Look for a hydraulic hose or mechanical cable at the caliper |
| Rotor size and condition | Rotor wear or heat damage can compromise new pads | Inspect for deep scoring, cracks, warping, or contamination |
| Pad compound | Changes noise, modulation, heat handling, and wear behavior | Follow the brake maker's recommendation for your use |
Do not choose pads only because the package says they are for an e-bike. That description may indicate a compound or heat rating, but it does not guarantee the shape fits your caliper. A pad that looks close can bind, move inside the caliper, or fail to contact the rotor evenly.
Are organic, semi-metallic, and metallic pads different?
Organic or resin pads are often quiet and easy to modulate, while metallic or sintered pads generally tolerate heat and demanding conditions better. Semi-metallic options sit between those traits. The best choice depends on the brake system, rider, terrain, weather, and manufacturer's compatibility guidance, not on a universal ranking.
- Organic or resin: Often a good fit for quieter road, neighborhood, and light trail riding. They can provide smooth control, but demanding descents and repeated heavy braking may accelerate wear or heat buildup.
- Semi-metallic: A middle-ground option for riders who want a balance of noise, initial bite, modulation, and durability. Compatibility still must be confirmed with the caliper and rotor.
- Metallic or sintered: Often selected for higher heat, wet conditions, heavier loads, or more demanding terrain. They may be noisier and can wear a rotor differently from resin pads.
Changing compound does not fix a misaligned caliper, contaminated rotor, worn hydraulic system, or poor braking technique. If the bike has a specific pad recommendation, stay with it unless a qualified technician confirms an alternative. Mixing an unfamiliar pad with a damaged or incompatible rotor can create a new safety problem.
What does electric bike brake pad replacement involve?
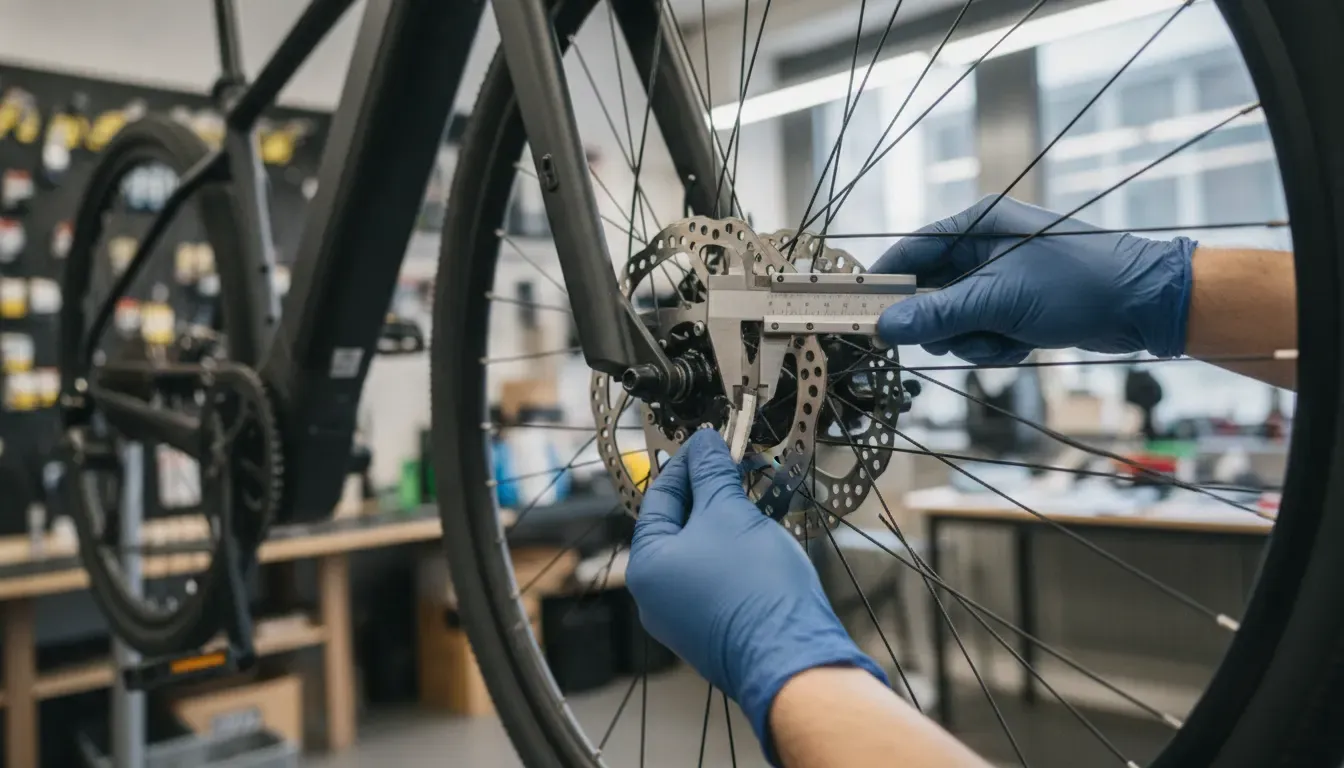
To replace electric bike brake pads, secure the bike, remove the wheel only as directed, remove the pad-retaining hardware, replace the pads without touching their friction surfaces, reinstall all hardware, center the caliper, and test the brake before riding. Hydraulic systems and unfamiliar calipers are better handled by a technician.
Exact procedures vary by brake design. The following is a decision-aware overview, not a substitute for the manual supplied with your brake system.
- Prepare the bike: Power down the e-bike, remove the battery if appropriate, stabilize the frame, and keep clean gloves, the correct hex keys, clean shop towels, and the specified replacement pads nearby.
- Protect the rotor: Avoid touching the rotor or pad friction surfaces. Keep chain lubricant, grease, suspension oil, and general-purpose cleaners away from the brake.
- Remove access hardware: Depending on the caliper, you may need to remove a retaining pin, clip, bolt, or wheel. Do not force a part or pry against the hydraulic piston with a sharp metal tool.
- Compare the new and old pads: Confirm the shape, backing plate, spring, pin, and orientation match. If they do not match exactly, stop and resolve compatibility before continuing.
- Reset and install carefully: Hydraulic pistons may need to be pushed back with an appropriate non-marring tool. Mechanical systems may need cable or caliper adjustment after the pads are installed. Do not squeeze a hydraulic brake lever while the wheel or pads are removed unless the manual specifically permits it.
- Reassemble and align: Reinstall the pads, clips, pins, wheel, and caliper hardware. Tighten according to the manufacturer's instructions. Check that the rotor runs between the pads without persistent rubbing.
- Test without riding: Squeeze the lever several times until it feels consistent. Spin the wheel carefully and confirm the brake engages. If the lever remains soft, the wheel is loose, the rotor rubs heavily, or hardware will not seat correctly, stop and book service.
Hydraulic brake work may involve piston alignment, hose damage, fluid contamination, or bleeding. Those issues are not solved by installing new pads. Mechanical brakes may need cable tension and caliper alignment. If you cannot identify the system, do not experiment on the brake that controls your next descent.
How should new e-bike brake pads be bedded in?
New brake pads should be bedded in with controlled, progressive stops in a safe area so the pad material transfers evenly to the rotor. Use the brake manufacturer's procedure, avoid panic stops during the first rides, and alternate braking with cooling time instead of dragging the brake continuously.
Before bedding, confirm the rotor and pads are clean and the wheel is secure. Choose a flat, low-traffic area without pedestrians, vehicles, loose gravel, or steep exposure. Begin at a modest speed and apply one brake at a time with firm but controlled pressure. Gradually repeat the process, allowing the system to cool between runs.
Do not sand a contaminated rotor and assume the problem is solved. If oil has reached the pad, the pad may need replacement. If the rotor is deeply scored, warped, cracked, or below its service limit, new pads alone are not enough. Persistent squealing after correct bedding also deserves diagnosis rather than repeated hard stops.
When should a technician handle brake pad replacement?
Choose professional service when the brake lever feels soft, the rotor is damaged, the system is hydraulic and needs bleeding, the pad is contaminated, the caliper or mount is damaged, or you cannot confirm compatibility. Stop riding immediately if braking is weak, inconsistent, grinding, or unable to hold the bike securely.
- The e-bike has been in a crash or the fork, frame, caliper, rotor, or wheel may be bent.
- The brake fluid, hose, or hydraulic fitting shows a leak.
- The brake lever pulls to the handlebar or never becomes firm.
- The rotor is cracked, severely scored, warped, loose, or contaminated.
- The caliper bolts, pad pin, spring, or mounting threads are damaged.
- New pads rub continuously, sit unevenly, or do not make full contact with the rotor.
- You are working on a high-power, heavy, cargo, trike, or off-road e-bike and are unsure whether the brake setup is adequate.
Voltaire Cycles of Central Oregon provides multi-brand bicycle and electric bike repair in Bend, including mechanical and electrical systems. The service team works on brands beyond the bikes sold in the store, so local riders can request an inspection when the correct pad, rotor, adjustment, or installation procedure is unclear.
How much does electric bike brake pad replacement cost?
Electric bike brake pad replacement cost depends on the pad type, brake design, access, rotor condition, and whether the job also needs alignment, cable adjustment, hydraulic bleeding, or other repairs. A simple pad swap is different from a complete brake service, so an inspection is the most reliable way to understand the work involved.
For a do-it-yourself job, the parts cost varies by caliper and compound. Professional service may include diagnosis, compatible parts, installation, adjustment, testing, and related wear-item recommendations. Do not choose a repair based only on the lowest part price. Incorrect pads or a neglected rotor can cost more after they create uneven wear or unsafe braking.
Before requesting service, bring the bike, charger if relevant to the shop's diagnostic process, owner's manual, and any pad packaging or photos you have. Note whether the problem affects the front or rear brake, when the symptom began, and whether the bike was recently washed, ridden in rain, transported, or involved in a fall.
How can you prevent premature brake pad wear?
Prevent premature brake pad wear by checking brake feel before rides, keeping rotors free of oil, using both brakes smoothly, reducing prolonged brake dragging on descents, and inspecting wear items as part of regular electric bike maintenance. Weight, speed, hills, cargo, and wet conditions should influence how often you inspect the system.
Use the owner's manual for cleaning and maintenance instructions. Avoid spraying general lubricant near the rotor or caliper. If you wash the bike, dry the braking surfaces and confirm consistent braking before the next ride. A short check before every ride, plus a more deliberate inspection during routine maintenance, is more useful than waiting for a loud noise.
Voltaire's electric bike maintenance guide covers brakes alongside tires, battery care, and drivetrain checks. The site's electric bike safety checklist is another useful pre-ride reference, especially when preparing for Central Oregon hills, paths, and mixed surfaces.
Get multi-brand brake inspection and electric bike repair in Bend.
Frequently Asked Questions
Do all electric bikes use the same brake pads?
No. Electric bikes use different calipers, pad shapes, retention hardware, rotors, and hydraulic or mechanical systems. Match the replacement to the exact brake model and position. Bike brand alone is not enough to confirm fit.
How often should e-bike brake pads be replaced?
Replace them when the friction material reaches the manufacturer's wear limit or when damage, contamination, unsafe noise, or braking changes appear. There is no reliable universal mileage interval because terrain, rider weight, cargo, speed, weather, and braking habits change wear.
Can you replace electric bike brake pads yourself?
A confident home mechanic may replace pads on a familiar system by following the brake manufacturer's procedure. Stop and seek service if the system is hydraulic, the rotor or caliper is damaged, the lever feels soft, or pad compatibility is uncertain.
Can new brake pads fix squealing?
Sometimes, but not always. Squealing can come from contamination, glazing, alignment, rotor condition, wet weather, or pad compound. If oil reached the pads or the rotor is damaged, installing pads without diagnosing the cause may not resolve the noise.
Should electric bike brake pads be bedded in?
Yes. Follow the manufacturer's bedding procedure with controlled progressive stops in a safe area. Bedding helps the new pad and rotor surfaces mate consistently. Avoid hard panic stops and prolonged brake dragging during the initial process.
When in doubt, treat a brake problem as a safety issue rather than a minor noise. A correct pad match, careful installation, and a complete post-service test can protect the rider, the rotor, and the rest of the e-bike.