

Electric Bike Brake Adjustment: DIY or Book Service
Reliable braking is one of the most important parts of every electric bike ride. If the lever feels soft, the rotor makes noise, or the bike takes longer to stop, an electric bike brake adjustment may restore proper control, or reveal a problem that needs professional service. This guide explains what you can inspect at home, how mechanical and hydraulic systems differ, and when brake work should be handled by a qualified technician.
Schedule a brake service consultation in Bend
What does an electric bike brake adjustment involve?
An electric bike brake adjustment is a check and correction of the parts that control stopping. Depending on the system, that can include aligning the caliper, centering the rotor, setting cable tension, checking pad clearance, inspecting hydraulic lever feel, and confirming that motor assistance or throttle operation stops appropriately when the brake is applied.
The goal is not simply to eliminate a squeak. A sound adjustment should leave the lever firm and predictable, the pads contacting the rotor evenly, and the wheel turning freely when the brake is released. Brakes also need enough friction to control the extra speed and weight that many electric bikes can carry.
Electric bike braking systems vary by model. Mechanical disc brakes use a cable. Hydraulic disc brakes use fluid pressure. Some systems include electronic brake sensors that interrupt motor assistance when you pull the lever. Research on electric motor control systems also describes the braking connection as a way to prevent added motor load when the brake is pulled. Your bike's exact cutoff design still depends on its manufacturer and controller. Read the supporting motor-control study.
How can you tell that your electric bike brakes need adjustment?
Short answer: Check for changes in lever feel, stopping distance, pad thickness, rotor condition, and unusual sounds. Small changes can be corrected with routine maintenance, but a soft hydraulic lever, damaged rotor, leaking fluid, or uncertain stopping performance calls for service before the next ride.
Inspect the brakes before each ride, especially after transporting the bike, riding in wet or dusty conditions, or storing it for a long period. Pair these checks with Voltaire's electric bike maintenance checklist for broader seasonal care. Watch for these warning signs:
- Lever travel: The lever reaches the handlebar, feels spongy, or moves much farther than it used to.
- Uneven stopping: The bike pulls to one side, shudders, or stops in a pulsing pattern.
- Noise: A brief sound after rain can be normal, but persistent grinding, scraping, or loud squealing deserves inspection.
- Pad wear: The friction material is thin, uneven, contaminated, or worn at an angle.
- Rotor problems: The disc is visibly bent, deeply scored, cracked, heavily discolored, or oily.
- Fluid or cable concerns: A hydraulic system shows a leak, or a mechanical cable is frayed, rusty, kinked, or difficult to move.
- Motor behavior: Assistance continues briefly after the brake is pulled, or a brake sensor cuts power inconsistently.
Do not continue riding to test a brake that cannot stop the bike confidently. Walk the bike to a safe location and arrange an inspection.
What should you inspect before making an adjustment?
Start with a clean, stable work area. Turn the bike off, remove the key or display if applicable, and prevent the wheel from turning while you inspect it. Do not squeeze a hydraulic brake lever with the wheel or rotor removed unless the manufacturer's instructions specifically allow it.
- Check the wheel: Confirm that the axle or quick release is seated and tight. A loose wheel can look like a brake problem and can create a serious handling hazard.
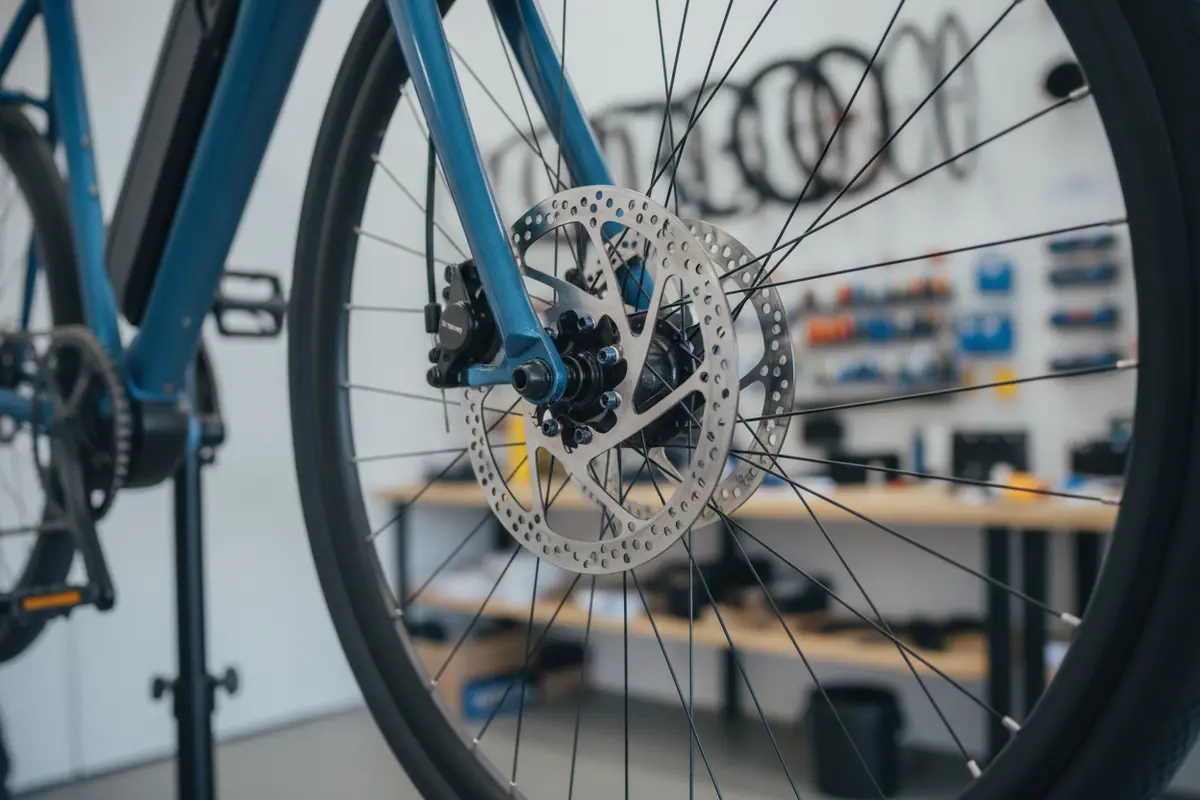
- Look at the rotor: Shine a light across both faces. Look for bends, cracks, deep grooves, oil, or blue-black heat marks.
- Check pad thickness: Use the manufacturer's wear limit when available. The backing plate is not friction material; do not count it as usable pad.
- Inspect the caliper: Make sure mounting bolts are present and that the caliper has not shifted. Do not loosen bolts unless you understand the alignment procedure.
- Examine the lever: It should return smoothly and have a consistent feel. The lever, clamp, and handlebar should be secure.
- Trace the cable or hose: Ensure it does not rub the tire, fork, frame, or sharp edge through the full steering range.
- Check the controls: Confirm that the brake light, motor cutoff, or display response works as intended, if your bike has those features.
Keep lubricants, chain oil, cleaners, and hand lotion away from pads and rotors. If contamination occurs, replacing the pad is often safer than trying to recover it. For replacement parts, match the exact pad shape and brake system rather than choosing by appearance alone. A product such as Clarks disc pads must be compatible with the caliper model, while rotor diameter, thickness, bolt pattern, and adapter position also matter. A Shimano brake rotor is not automatically correct for every electric bike.
How do you adjust mechanical disc brakes?
Short answer: Mechanical disc brake adjustment usually involves setting cable tension, ensuring the pads are correctly positioned, and centering the caliper. Make only small changes, then spin the wheel and test the lever while the bike is stationary.
Mechanical systems can be approachable for an experienced home mechanic, but the exact design differs. Some calipers have one moving pad and one fixed pad. Others allow adjustment on both sides. Read the brake manufacturer's instructions before turning an adjustment dial or pad bolt.
- Check cable condition first. If the cable is frayed, rusty, kinked, or sticky, replace it rather than compensating with more tension. An XLC cable tip may help finish a compatible replacement, but it does not repair a damaged cable.
- Set the barrel adjuster. Turn it in most of the way, then back it out slightly so you retain room for later fine adjustment.
- Set pad clearance. Adjust the fixed pad or inner pad according to the brake design. The pad should sit squarely against the rotor, not catch the spokes or extend beyond the rotor edge.
- Center the caliper. If the caliper is movable, loosen its mounting bolts just enough to allow alignment. Apply the brake, hold the lever, and gently tighten the bolts in stages if that is the procedure specified for your model.
- Set cable tension. Remove excessive lever travel without making the pad drag. Secure the cable and trim only after confirming the adjustment.
- Spin and listen. A very light intermittent tick can indicate minor rotor runout, but continuous rubbing means the setup still needs attention.
Never use cable tension to hide a worn pad, bent rotor, seized caliper, or damaged housing. Over-tightening can cause drag, heat, premature wear, or loss of braking control.
How are hydraulic electric bike brakes adjusted?
Short answer: Hydraulic brakes are generally centered and checked rather than adjusted by adding lever tension. Persistent softness, excessive travel, or a leak may indicate air or fluid trouble that requires bleeding or component repair by a qualified technician.
Hydraulic systems use fluid pressure to move the pistons. Many have automatic pad compensation as the pads wear, so repeatedly turning the reach dial or moving the lever clamp will not correct a spongy feel. A hydraulic lever that suddenly pulls close to the grip is a safety concern.
Basic owner checks include looking for fluid around the lever, hose connections, and caliper. Also check that the rotor is clean, the wheel is seated, and the pads have adequate thickness. Do not open the system or add fluid unless the brake manufacturer specifies the exact fluid and procedure. Mineral oil and DOT fluid are not interchangeable.
If the hose is damaged, the lever is soft after a fall, fluid is visible, or braking strength has changed sharply, stop riding and book service. Bleeding a brake requires the correct fluid, tools, fittings, and disposal process. Incorrect fluid can damage seals and leave the brake unsafe.
What should you know about brake pad wear and rotor noise?
Pad wear is affected by rider weight, terrain, weather, cargo, speed, brake habits, and the condition of the rotor. Front and rear pads may wear at different rates. A visual check through the caliper can be difficult, so remove the wheel or pad only if you know the manufacturer's procedure and can reinstall the retaining hardware correctly.
Rotor noise has several possible causes. Water and surface residue may create temporary noise. A contaminated pad can squeal continuously. A misaligned caliper can rub. A bent rotor can make a repeating tick once per revolution. Grinding usually means the friction material may be gone and the backing plate is contacting the rotor.
Do not sand a rotor casually or spray general-purpose cleaner on the braking surface. Use a brake-safe cleaning method recommended for the system. If oil has reached the pad, replacement is usually the prudent choice. For a bike that needs more than a simple cleaning, a technician can determine whether the rotor, pad, caliper, or wheel alignment is responsible.
How should you bed in new brake pads?
Short answer: Bedding-in transfers an even layer of pad material to the rotor and helps new pads reach consistent stopping power. Follow the brake maker's instructions in a clear, low-traffic area and avoid locking the wheel.
After installing compatible pads or a rotor, verify that all fasteners are secure and that the lever feels normal. Choose a gentle slope or flat area where you can stop safely. Accelerate to a moderate speed, apply one brake with firm, controlled pressure, and slow without skidding. Repeat several times, allowing the brake to release between applications. Increase speed and braking force gradually if the system remains stable.
Do not hold the brake continuously down a long hill during bedding-in. That can create excess heat and an uneven transfer layer. Do not bed contaminated pads into a clean rotor. If the brake smells sharply, fades, or becomes inconsistent, stop and let it cool before inspecting the setup.
Which brake tasks are safe to DIY?
Whether a task is appropriate at home depends on your tools, the brake design, and your confidence in checking the result. A cautious owner may clean the rotor with an approved method, inspect wear, verify wheel seating, make a small mechanical barrel-adjuster correction, or replace pads when the manufacturer's instructions are clear.
Book qualified service when the task involves hydraulic bleeding, a damaged hose, a cracked or badly bent rotor, stripped mounting threads, a seized piston, recurring rubbing, uncertain pad compatibility, or a brake that cannot be tested safely. Voltaire's professional e-bike tune-up guide explains how a broader inspection can address mechanical and electrical concerns together. High-powered electric bikes, heavy cargo bikes, and bikes used on steep trails deserve an especially conservative approach because brake loads can be substantial.
A service visit should include more than turning a screw. Ask the technician to inspect pad and rotor condition, caliper alignment, fasteners, cable or hose routing, lever operation, wheel security, and any electronic brake cutoff. Voltaire Cycles of Central Oregon provides local showroom support in Bend, hands-on evaluation, technical guidance, and service for electric mobility products. Riders who need maintenance supplies can also review e-bike all-weather lube and choose products that fit their maintenance routine.
What does a brake inspection checklist look like?
| Item | Owner check | Book service when |
|---|---|---|
| Lever feel | Firm, smooth, consistent movement | Lever is spongy, pulls to the grip, or changes suddenly |
| Pads | Enough friction material and even wear | Pads are contaminated, damaged, very thin, or unknown |
| Rotor | Clean, secure, and free of obvious damage | Rotor is cracked, deeply scored, badly bent, or overheated |
| Mechanical cable | Moves smoothly with intact housing | Cable is frayed, seized, kinked, or cannot hold adjustment |
| Hydraulic system | No visible leak and normal lever feel | Fluid leaks, hose is damaged, or bleeding is needed |
| Motor cutoff | Assistance stops consistently when tested safely | Cutoff is delayed, intermittent, or absent |
When should you book an electric bike brake adjustment?
Book service before riding if the bike cannot stop predictably, the lever reaches the handlebar, the brake makes grinding sounds, or you see a leak or structural damage. Schedule a routine inspection when adjustments do not last, pads wear unevenly, or noise returns after cleaning. Brake performance should be dependable before commuting, carrying cargo, descending trails, or riding in traffic.
Schedule a brake inspection in Bend
Frequently asked questions
Can I adjust electric bike brakes without turning on the bike?
Yes. Most mechanical inspection and alignment work is done with the bike powered off. Keep the wheel secure, avoid moving parts, and test the motor cutoff only in a controlled setting after the mechanical brake check is complete.
Why do my electric bike brakes squeal after rain?
Moisture and surface residue can cause temporary noise. If squealing continues after the rotor dries and is cleaned with an approved method, inspect for contamination, misalignment, worn pads, or rotor damage.
How often should electric bike brakes be checked?
Check them before every ride and perform a closer inspection whenever lever feel, noise, stopping distance, or pad condition changes. Service intervals depend on use, terrain, weather, load, and the manufacturer's guidance.
Can a brake adjustment fix a soft hydraulic lever?
Usually not. A soft hydraulic lever may indicate air, a leak, worn components, or another system problem. Stop riding and have the system inspected rather than trying to compensate with unrelated adjustments.
When in doubt, choose a professional inspection so your electric bike is ready to stop with control on the roads and trails you ride.