

Electric Bike Trail Rules Oregon: Where to Ride Responsibly
Electric bike trail rules Oregon riders encounter are not one statewide permission slip. Access depends on the land manager, the specific trail, posted signs, and the bike’s design and class. Before planning a ride, check the current rules for that exact route and be ready to turn around if e-bikes are not allowed.
Explore electric bikes for your riding plans
What do electric bike trail rules in Oregon actually depend on?
In practice, trail access is decided at the site level. A rule that applies to one trail system does not automatically apply to a nearby trail, even when both are public land. The agency may distinguish among non-motorized trails, roads, and designated motorized routes; local policies can add further limits.
Start with three questions: Who manages the land? What class of e-bike do you have? Does the manager list your exact trail as open to that class? If an online map and a trailhead sign seem to conflict, pause and seek clarification from the managing agency rather than assuming the more permissive interpretation.
A practical way to think about access is as a route-specific checklist rather than a general yes-or-no rule for Oregon. A paved multi-use path, a natural-surface hiking trail, and a designated motorized route can sit near one another yet have different use designations. Even within one trail network, a connector may cross a boundary or enter a protected area. Do not assume that permission on one segment carries over to the next.
For example, suppose a map labels a forest road open to bicycles but says nothing about a singletrack spur branching from it. That is not enough to conclude that the spur is open to an e-bike. Find the spur’s designation, check the manager’s e-bike guidance, and note where the route changes. If you cannot resolve the question before leaving, plan to stay on the route whose status you can confirm.
How do e-bike classes affect access?
The common class labels describe how an e-bike provides assistance, but the label itself does not grant trail access. Managers can set separate access rules, and some locations may allow only certain types or prohibit e-bikes on a particular route. Check the official route guidance before you ride.
| Class | General assistance description | What to verify for trail use |
|---|---|---|
| Class 1 | Pedal assist, with assistance stopping at 20 mph | Whether pedal-assist bikes are allowed on this specific trail |
| Class 2 | May provide assistance by throttle, with assistance stopping at 20 mph | Whether throttle-equipped bikes are allowed |
| Class 3 | Pedal assist, with assistance stopping at 28 mph | Whether the route allows this class and its higher assisted speed |
These are broad class descriptions, not a substitute for the bike’s labeling, Oregon law, or the land manager’s current policy. If a bike has been modified, its original class designation may no longer describe how it operates. Keep the bike within its intended configuration and confirm any uncertainty with the manufacturer or a qualified shop.
Before you travel, locate the class label on the bike and check the owner’s information for the assist mode and speed limit. Do not rely only on the product name, motor size, or what a friend calls the bike. A label answers what the bike is designed to be; the trail manager’s policy answers whether that bike can use a particular route. You need both answers.
Also distinguish a class description from a route rule. A trail notice might say “bicycles permitted” without specifying electric bicycles, or it might name permitted classes explicitly. When the wording is broad or unclear, ask the agency rather than interpreting the most convenient meaning. Keep any response or official notice with your ride notes, but recheck before a later trip because policies and closures can change.
Which agency rules should you check before an Oregon ride?
Identify the land manager first. Federal, state, county, city, and special recreation-area managers may each have rules and maps. A trail crossing a boundary can change from one policy area to another. Search for the official page for the trail system and look specifically for e-bike or electric bicycle access, rather than relying only on a general recreation description.
Oregon’s rules are part of a broader mix of state and local approaches. An academic overview of North American e-bike regulation describes how approaches differ among jurisdictions; it is useful background, but it is not a current trail-by-trail Oregon access list. Read the report at Regulations of E-Bikes in North America, then verify the local manager’s current guidance.
- Find the official trail page. Confirm the agency name and whether the page is current.
- Read the access language. Look for e-bike class distinctions, closures, and designated routes.
- Check alerts. Fire, maintenance, weather, or wildlife conditions can temporarily close a route.
- Confirm at the trailhead. Review signs and any posted updates before unloading the bike.
Use the official map and the page for the named trail system together. A regional recreation page can help you find a destination, but it may not contain the operational detail you need. Look for a date on the notice, a closure update, or a manager contact. If the page is old or does not mention e-bikes, call or message the managing office with a concise question: “Is my Class 1 pedal-assist e-bike allowed on this named trail today?”
For a local ride, Voltaire Cycles of Central Oregon can help you think through bike fit and intended use. The shop’s all-brand repair and service page is also a starting point for maintenance questions before a ride. Trail access decisions, however, belong to the land manager.
How should you read signs and access notices?
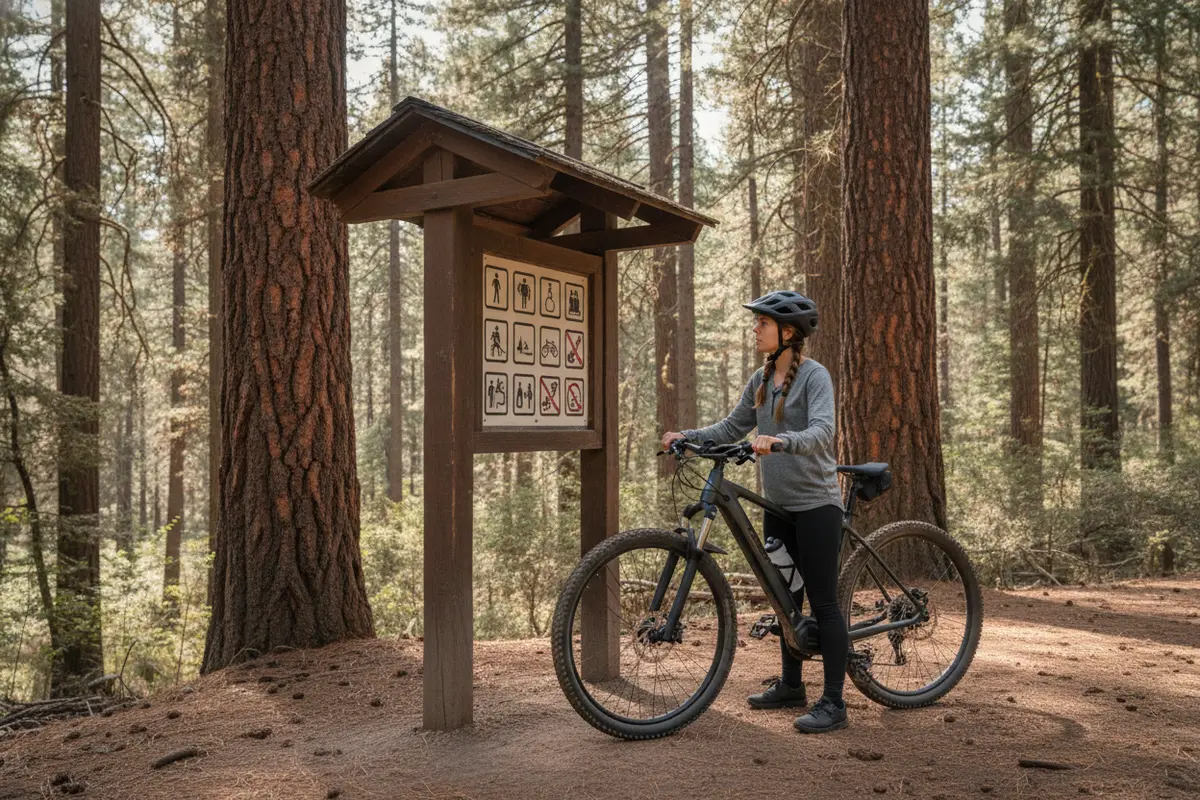
Trailhead signs may identify permitted uses, restrictions, closures, or the managing agency. Read the complete notice, not just a symbol or a sign at the parking area. A sign can apply to one route while another branch has different access. If a closure or restriction is posted, follow it even if an older map or a third-party app says the route is open.
When the wording is unclear, do not treat silence as permission. Photograph or note the sign, contact the agency through its official channel, and choose a route whose rules you can confirm in the meantime. This approach avoids accidental violations and helps protect access for future riders.
At a junction, stop where you are out of the way and read every panel. Check whether a restriction applies to all bicycles, motorized vehicles, a named segment, or a date range. A small symbol can be easy to misread, so use the words on the sign and compare them with the agency’s written guidance. If a sign is damaged or obscured, do not guess at what it used to say.
If you find a closure after starting, turn around at a safe place rather than attempting a detour through vegetation or onto an unmarked track. Note the location so you can report a damaged sign or ask the manager for clarification later. Do not post an unverified interpretation as a definitive rule for other riders.
What does responsible e-bike etiquette look like on shared trails?
Ride at a speed that lets you stop within the visible, clear distance ahead. E-bikes can make it easier to maintain pace on climbs, but they do not change the need to yield appropriately, communicate calmly, and leave room for other users. Slow well before passing, announce your approach in a friendly voice, and wait until it is safe to pass.
- Yield according to posted rules and local trail guidance; be especially considerate around people walking or traveling uphill.
- Stay on the designated tread. Do not widen the trail to avoid mud or obstacles.
- Keep noise low and avoid sudden acceleration near other users or animals.
- Pack out all waste, including food scraps, and leave natural features where they are.
- Ride in control on descents, blind corners, and narrow sections; stop in a visible, safe place when needed.
Courtesy is practical safety, not just good manners. A quiet greeting and a controlled speed give other people time to respond. If a trail is crowded or too narrow for a comfortable pass, wait for a wider spot instead of pressuring someone to move.
Think through a pass before you make it. Reduce speed early, make your presence known without startling anyone, and wait for a place with enough width and visibility. If a person is walking a dog, give extra room and allow time for them to manage the leash. Do not squeeze past a group at a blind turn just because your bike can accelerate quickly afterward.
On a climb, a rider moving slowly may need the full width of the trail to maintain balance. Give space and communicate politely before passing. On a descent, keep enough margin to stop if another user appears around a bend. If visibility is short, choose a pace that accounts for that limitation rather than relying on a clear trail from the last few seconds.
How can you reduce wildlife disturbance?
Wildlife may be present even when you do not see it. Keep distance, never chase or approach an animal for a photo, and do not block its route. If you encounter wildlife, stop at a safe distance, give it room to leave, and follow any agency instructions or seasonal closures.
Do not assume that an animal will move out of the way simply because a bike is approaching. Slow down early in areas with limited sightlines, dense vegetation, or posted wildlife notices. If an encounter makes the trail feel unsafe, turn back or choose another route.
Keep food secured and take rubbish with you. Do not feed wildlife or leave scraps as a way to lure an animal into view. If an animal is close to the trail, avoid crowding it with a group of riders; wait quietly at a distance or retreat along the route you came from when that is the safer choice. Follow any specific instruction from the land manager, including seasonal restrictions.
Wildlife and people may share narrow spaces, especially where vegetation limits sightlines. Slow before entering a blind corner and avoid sudden noise or acceleration. If you see tracks, hear movement, or encounter a posted notice, treat that as a reason to ride attentively, not as an invitation to seek a closer view.
How do seasons and weather change trail decisions?
Conditions can change quickly across Central Oregon. Rain and thaw can leave some trails soft; riding wet, vulnerable ground can deepen ruts and widen the tread. Snow, ice, smoke, high temperatures, and fire restrictions can also affect safety or access. Check current land-manager notices and local weather before leaving.
Use the surface, not the calendar, to make a decision. If your tires are leaving deep tracks, if the route is muddy enough to require riding around puddles, or if traction is uncertain, turn around. Keep to durable surfaces and avoid creating a new path around a wet or blocked section. Carry water and appropriate layers, and have a shorter backup plan when conditions are uncertain.
Consider the whole route, not just the conditions at the parking area. A shaded section may hold ice while a sunny approach is dry; a lower trail may be firm while a higher segment is muddy or snow-covered. Check the forecast for the area you will ride and consider how conditions may change during the return. If smoke, heat, or a storm makes the trip uncomfortable or unsafe, shorten the ride or postpone it.
Build a simple decision point into your plan. For instance, decide before leaving that you will turn back if the first section is soft enough to rut, if you encounter a closure, or if visibility drops. Having a clear threshold avoids the temptation to continue only because you have already traveled to the trailhead. A different route or another day is a sound outcome.
How can you prepare your e-bike and choose a suitable route?
Matching the bike to the route starts with access and ends with a mechanical check. Confirm the bike’s class and operating mode, then inspect tires, brakes, battery charge, and lights. A route that is legally open may still be a poor fit if its distance, elevation, surface, or technical difficulty exceeds your comfort or the bike’s intended use.
- Choose a route with confirmed access. Use the managing agency’s current map and notices.
- Estimate the ride conservatively. Account for elevation, surface, weather, and the return trip.
- Inspect the bike. Check tire pressure, brake response, axle security, and battery connection.
- Bring essentials. Carry water, a repair plan, a charged phone, and any safety equipment appropriate to the ride.
- Tell someone your plan. Share the route and expected return time when riding in a remote area.
Use a walk-around inspection, not just a glance at the battery display. Look for cuts or embedded debris in the tires, test each brake at low speed before joining a busy path, and check that the wheels are secure. Confirm that the battery is seated and that the assist system starts normally. If anything feels loose, noisy, or inconsistent, address it before setting out.
Estimate energy for the entire outing, including the return and any unplanned detour. Steep climbs, soft surfaces, frequent stops, and higher assist can change how much battery remains. Do not plan a route that only works if every condition is ideal. A shorter loop with a comfortable reserve is a better choice than reaching the far point with no practical margin.
Tell someone the trailhead, route, and expected return time if you will be out of reliable phone coverage. Carry a basic repair option suited to your bike and know how you would get back if a mechanical issue prevents riding. For service questions, the shop’s bicycle repair and maintenance information can help you plan a check before a longer outing.
For product comparisons, browse the shop’s electric bike selection and consider the terrain and access rules you expect to encounter. Riders who want to test handling in person can visit the Bend showroom for hands-on guidance and a test ride; confirm current options before making a trip.
What should you do if rules are unclear?
When you cannot confirm access, choose a different route until you can. Contact the land manager with the trail name, entrance, and bike class, and ask whether that specific route is open. Avoid relying on an old forum post, a product description, or another rider’s assumption as the final authority.
Keep a simple record of the official page and any seasonal notice you checked. Policies can change, so repeat the check before later rides, particularly after a season change, storm, fire event, or agency announcement. Being willing to adjust plans helps preserve a welcoming experience for all trail users.
A useful question to send the agency includes the specific route, the bike class, and the date you intend to ride. Ask whether the rule covers the trail itself, connecting roads, and any adjoining segment. If you receive a reply, preserve the link or message and note its date. That record can guide your next check, but it should not replace checking for a later closure or policy update.
Use a backup plan instead of turning uncertainty into an on-trail experiment. Select a route with clearly stated access, or switch to a surface path where the manager’s rules are clear. If the only available information is an old map, an informal post, or an unclear sign, wait until you can confirm. Respecting a restriction protects both the landscape and future access for riders.
Compare electric bikes for your next ride
Frequently asked questions
Can I ride any class of e-bike on Oregon trails?
No. Access depends on the land manager and the particular route. Check current rules for the exact trail and your bike’s class before riding.
Does a public trail automatically allow e-bikes?
No. Public ownership does not mean every vehicle type is allowed on every trail. Look for the managing agency’s official access policy and posted signs.
What should I do if a trail sign conflicts with an online map?
Follow the posted restriction or closure and contact the managing agency for clarification. Do not assume an older map overrides a current sign.
Can I ride when a trail is muddy?
Use conditions as your guide. If tires leave deep ruts or you would need to leave the tread to avoid damage, turn around and choose a more durable route.
Responsible riding begins with checking access, respecting closures, and sharing the trail with care; when in doubt, ask the land manager or choose another route.