

Electric Bike Tire Replacement: Fit and Safety Guide
A flat tire is frustrating, but choosing a replacement by appearance alone can create a larger problem. E-bike wheels must handle the bike's motor, rider, cargo, and intended terrain. So a tire that looks close may still have the wrong width, valve, pressure range, or clearance.
A safe electric bike tire replacement matches the wheel's size and valve type. Then confirms rim fit, frame and fork clearance, load needs, tire construction, and the manufacturer's pressure guidance. If the wheel uses a hub motor, damaged components, or wiring you are not comfortable disconnecting, a qualified service shop can verify the setup before you ride.
Start by reading the size printed on the existing sidewall and checking the wheel, rim, and bike manual rather than relying on a generic size label. That quick inspection helps separate a straightforward tire purchase from a compatibility or safety question that deserves hands-on attention.
Review electric bike repair and service options with Voltaire Cycles of Central Oregon
What should you check before buying an electric bike tire replacement?
Quick answer: Read the complete sidewall size, then verify rim width, valve type, tube or tubeless construction, clearance, axle and motor setup, and load requirements. Matching only the diameter is not enough. The replacement must fit the wheel and the way you ride.
Start with the tire and wheel already on your e-bike, not with a product photo that looks similar. Read the size printed on the sidewall. Common formats include 700x40C, 27.5x2.4, and 29x2.2, and the replacement needs to match the wheel's diameter and fit the rim's width. A tire that is too wide can contact the frame, fork, or fender, while a tire that is too narrow may not provide the intended support or handling.
Write down the complete sidewall marking before you shop. Then check these compatibility points:
- Rim diameter and width: Confirm both measurements, not just a familiar number such as 27.5 or 29. The tire must seat correctly on the actual rim.
- Valve type: Match the inner tube valve to the hole in the rim. A replacement tube should match the tire size and valve type, while a tubeless wheel requires a compatible tubeless tire and sealant setup.
- Tube or tubeless construction: Do not assume a tube-type tire can be used in a tubeless system, or that any tubeless-ready tire is a complete tubeless conversion. Check the rim, tape, valve, and manufacturer's requirements.
- Frame and fender clearance: Measure the space around the inflated tire, including the sides and top. Leave room for normal wheel movement, debris, and the fender hardware.
- Wheel and axle type: Identify whether the wheel uses a front or rear hub motor, a standard axle, or a thru-axle. Hub-motor wiring and axle procedures can make a rear replacement more involved, so consult the e-bike manual before disconnecting anything.
- Load and riding needs: Review the tire's stated load guidance and consider the combined demands of rider, cargo, and the e-bike itself. A commuter setup, utility bike, and trail bike may need different casing and tread choices.
Use Voltaire's guide to electric bike tire types to compare tread and construction choices. Product pages can also illustrate why size matters: the 20x3.0 replacement e-bike tire is a specific fit example, not a universal e-bike standard. For another size reference, review the 28 x 1.75 e-bike tire.
If the sidewall is worn, the rim is damaged, the clearance is uncertain, or the manual is unavailable, pause before ordering. Bring the bike, wheel, or clear sidewall information to Voltaire's Bend showroom, or review the fit with the electric bike repair and service team. Confirming these details first is safer than trying to make an appealing but incompatible tire work.
How do tire type, load, and pressure affect replacement choice?
Quick answer: Choose a tire for your surface and total load, then set pressure within the tire and bike manufacturer's guidance. Smooth tread can suit pavement, while more open tread can support trail traction. Rider weight, cargo, weather, and terrain all affect how the tire behaves.
The right replacement depends on more than matching a diameter. Your riding surface, total load, weather, and preferred handling all influence whether a tire feels stable and efficient. Pressure then changes how much tread contacts the ground, which affects traction and comfort. Research from West Virginia University notes that pressure should be considered alongside rider weight, road or trail conditions, weather, and tire type. Read the tire sidewall and bike manual before setting a final pressure, rather than copying a number from another bike.
| Use case | Tire considerations | Pressure and traction reminder |
|---|---|---|
| Commuting and pavement | A smoother tread generally reduces rolling resistance on pavement. Confirm that the replacement diameter and width fit the frame, fork, fenders, and rim. | Use the sidewall and manual as your boundaries. Excess pressure can reduce comfort and increase damage risk, while too little can increase rolling resistance and pinch-flat risk. |
| Mixed-use riding | Choose a tread that balances pavement efficiency with enough surface pattern for gravel, packed paths, or changing conditions. Consider your body weight, cargo, and any regular passenger load when checking the tire's stated limits. | Pressure affects the contact patch. Adjustments may be appropriate for load, terrain, weather, and tire type, but there is no universal setting for every rider or tire. |
| Trail-oriented riding | A knobby tread can help maintain traction on trails because its gaps engage uneven surfaces. A larger diameter may clear obstacles more easily, but only if the wheel size and available clearance match the bike. | Do not assume lower pressure is always better. Protect the rim and tube from impacts, and verify the permitted range before changing pressure for loose or wet terrain. |
Load matters even when the tire size is correct. A rider carrying touring gear or a heavy rear rack may place substantially more demand on the rear wheel than an unloaded commuter. Look for the tire's specifications, check rim compatibility, and account for clearance under compression and around fenders. The replacement must also use the correct valve type for the tube or rim system.
Weather can change the feel of a setup. Wet pavement, loose gravel, and rough trails reward a considered balance of contact and tread, not simply the highest pressure printed on the sidewall. After installation, inspect the seating and ride cautiously while confirming that steering, braking, and stability feel normal. For more background, review this guide to electric bike tire types before choosing a replacement.
How do you replace an electric bike tire safely?
Quick answer: Power down, document the wheel hardware, follow the manual for motor connectors, inspect the rim and tire. Seat the new tube without pinching it, inflate to the sidewall guidance, and test the wheel slowly. Stop when wiring, brakes, or alignment are uncertain.
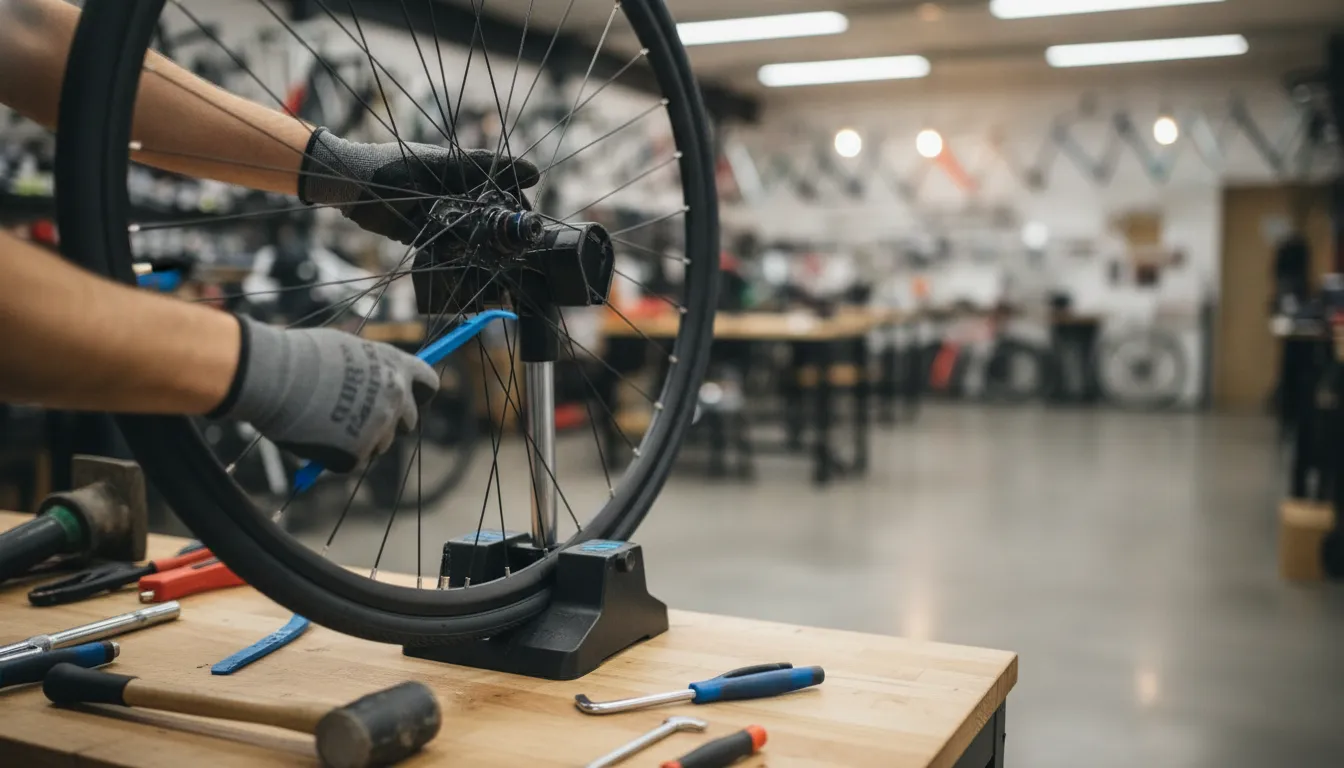
A careful electric bike tire replacement is less about force than sequence. Work on a clean, stable surface, keep small washers and hardware in order, and stop if the wheel design or motor wiring is unfamiliar. These steps describe a tubed setup. Tubeless systems and some hub-motor wheels require model-specific procedures.
- Gather the right tools and confirm the replacement. Have two or three quality tire levers, a pump with a pressure gauge, the correct tube if your system uses one, and the appropriate wrench or hex tools. A torque wrench is useful for axle nuts or motor hardware. Confirm the replacement matches the existing tire size and valve type before removing anything. The size is normally printed on the sidewall, in formats such as 700x40C, 27.5x2.4, or 29x2.2. Review the basic tire-changing tool and sizing guidance before starting.
- Power down and document the wheel setup. Turn the bike off, remove the battery when the manufacturer's procedure permits it, and keep the key away from the controls. Take clear photos of the axle, washers, spacers, brake rotor position, and cable routing. If the wheel has a hub motor, follow the manufacturer's manual for the motor connector and axle procedure. Disconnect connectors only as directed, without pulling on wires. Hub-motor wiring or uncertainty about the procedure is a reason to use a shop, not improvise.
- Remove the wheel and deflate the tire. Release the brake as required by the bike's design, then remove the axle hardware while keeping each washer and spacer in its photographed order. Fully deflate the tire by removing the valve cap and opening the valve. Use the levers to lift one bead over the rim, then remove the tube and the tire without levering against or damaging the rim.
- Inspect before installing anything. Check the tire inside and outside for glass, wire, thorns, or another puncture source. Inspect the rim, rim tape, valve hole, and spokes for sharp edges or damage. Installing a new tube without finding the original cause can lead to another flat.
- Install the replacement tube and tire. Slightly inflate the tube so it holds its shape. Place the valve stem through the rim first, then fit the tube inside the tire. Work the bead onto the rim by hand where possible. Keep the tube away from the rim edge and do not pinch it between the tire and rim as you finish seating the bead.
- Check seating and set pressure gradually. Inflate the tire partway and inspect both sidewalls around the entire rim. Look for bulges, an uneven bead line, or a valve that is pulling sideways. If anything looks wrong, deflate, reposition the tube or tire, and check again. Once the bead is seated evenly, inflate to the pressure printed on the tire sidewall, not a guessed number. Use this public bike-maintenance guide for tube seating and pressure checks.
- Reinstall, reconnect, and test slowly. Refit the wheel in the correct direction, reinstall the rotor and all washers or spacers, and tighten the axle hardware according to the bike manual. Confirm the brake rotor is centered and the wheel spins without rubbing. Reconnect a hub-motor connector only as instructed, making sure it is fully seated and routed safely. Before normal riding, perform a short, slow test ride of about one to two minutes. Check braking, steering, wheel stability, and motor behavior, then stop immediately if anything feels loose, noisy, or misaligned.
When is it time to replace an e-bike tire?
Quick answer: Replace the tire for deep cuts, exposed casing, cracking, bulges, split sidewalls, bead damage, severe tread wear, or repeated flats after the original puncture source is removed. A single small puncture may be repairable if the casing and rim remain sound.
There is no universal mileage or calendar interval for replacing an e-bike tire. Inspect it regularly and base the decision on its condition, how it holds air, and the demands of your riding. A tire that looks acceptable at a glance can still be unsafe if its casing, sidewall, or bead has been compromised.
Look for damage that cannot be repaired
Replace the tire when you see deep cuts, exposed casing threads, cracking, a bulge, a split sidewall, or damage around the bead. These defects can allow the tube to push through the casing or prevent the tire from seating evenly on the rim. Do not continue riding on a tire with a visible bulge or major sidewall damage. Deflate it and have the wheel inspected.
Worn tread is another replacement signal. If the tread is visibly flattened, unusually smooth for its intended terrain. Or worn thin enough that the casing is becoming visible, the tire has lost part of its protective structure and traction. Embedded glass, wire, or other debris should be removed carefully, but a puncture channel that keeps reopening may mean the casing is no longer dependable.
Separate a repairable puncture from a worn tire
A single small puncture does not automatically require a new tire. First inspect the inside and outside of the tire for glass or another object that caused the flat, as recommended by the Portland bike maintenance guide. If the tire casing is sound and the problem is limited to a replaceable or patchable tube, a repair may be appropriate.
Replacement becomes the safer choice when flats happen repeatedly, especially after you have removed the original puncture source. Frequent flats can indicate that the tire is worn. A tube that will not hold air after a correct repair should also be replaced. While the tire and rim should be checked for a sharp object, rim damage, or a problem at the valve.
Make inspection part of routine maintenance
Check tire pressure weekly and use that opportunity to scan the tread, sidewalls, valve area, and rim for new damage. For a more complete upkeep routine, follow this e-bike maintenance guide. If you are unsure whether a mark is cosmetic or structural, stop riding until a qualified technician can evaluate it.
When should Bend riders use a professional e-bike service shop?
Quick answer: Use a shop when sizing, clearance, wheel damage, hub-motor wiring, brake alignment, tubeless installation, or post-installation safety is uncertain. Professional inspection is also wise when flats recur or the wheel will not seat, spin, or brake normally.
A straightforward tube change is not always a straightforward repair. Consider professional help when you are unsure about tire sizing or frame clearance, especially if the replacement changes the tire width, casing, or intended use. Bring the bike or wheel, the tire sidewall information, and the owner's manual if you have it. A technician can verify the rim, tire, valve, clearance, and installation requirements rather than relying on appearance alone.
Repeated flats are another reason to stop replacing tubes without investigating the cause. The tire may be worn, or glass and another puncture source may still be inside the casing. A damaged, bent, or questionable rim also deserves inspection before a new tire is installed. Wheel condition affects how the tire seats and how confidently the bike handles, so this is not a good place to guess.
Use extra caution with hub-motor wheels. Removing a wheel may involve electrical connectors, axle hardware, or procedures that vary by manufacturer. If you are not certain how the motor wiring disconnects, how the wheel must be positioned. Or how the hardware should be secured, let a qualified technician handle the work. Brake rotor alignment is another practical shop decision. If the rotor rubs after the wheel is refitted, the brake feels abnormal, or the wheel is heavy and difficult to remove safely, avoid forcing the repair.
Professional assistance is also sensible when a tubeless setup is unfamiliar, when the bead will not seat evenly, or when you have any safety concern after installation. E-bikes can be difficult to lift and stabilize, and a short test ride does not replace a proper inspection when something feels wrong.
Voltaire Cycles has an in-house Service Center staffed by certified technicians. The team services all electric vehicle brands, including brands not sold in the store, and handles mechanical work involving wheels and brakes. Its service process includes inspection, work documentation, quality control, and test-ride verification before a vehicle is returned. Bend and Central Oregon riders can review fit or safety questions through electric bike repair and service for all brands rather than taking a risky guess at home.
How can you make the replacement last longer?
Quick answer: Inspect the tire and rim regularly, check pressure at least weekly within the manufacturer's range, remove puncture-causing debris. Confirm the valve and bead remain straight, and investigate recurring flats instead of repeatedly replacing tubes.
A new tire lasts longer when you treat it as part of the wheel system, not as a one-time fix. After an electric bike tire replacement, inspect the tread and sidewalls regularly for cuts, cracking, bulges, embedded glass, and other debris. If you recently had a flat, check both the inside and outside of the tire before riding again. A small piece of glass or wire can remain hidden in the casing and puncture the replacement tube.
Check tire pressure at least weekly, and always use the pressure range printed on the tire sidewall as your starting point. The correct setting depends on more than the number on a pump gauge. Rider weight, terrain, weather, and tire type all affect how the tire contacts the ground. Pressure that is too high can reduce comfort and increase damage risk. Pressure that is too low can increase rolling resistance and the chance of a pinch flat. Adjust within the manufacturer guidance, then pay attention to handling and traction on the surfaces you actually ride.
Keep the valve and tube setup correct as well. Confirm that the valve remains straight and that the tube is not pinched between the tire and rim. A tire that is not seated evenly can develop a visible bulge or handle unpredictably. For tubeless systems, follow the tire and rim manufacturer's requirements rather than assuming a tube-based setup will work.
After service, rotate the wheel and look for wobble, rubbing, or uneven clearance. Squeeze the brake lever and confirm that the wheel remains properly aligned and the brake does not drag. Take a short, slow test ride before returning to normal speed. If flats keep recurring, the rim, tire, tube, debris exposure, or installation may need a closer inspection. Voltaire's e-bike maintenance guide offers additional upkeep guidance for routine checks.
Get hands-on help checking your e-bike tire fit, wheel, or replacement installation
Frequently Asked Questions
Can I change an electric bike tire myself?
Yes, if you are comfortable removing the wheel, handling tire levers, and checking the finished installation. Hub-motor wheels require extra caution because motor connectors and axle procedures vary. Follow the bike manufacturer's manual, inspect the rim and tire, and take a short, slow test ride before returning to normal speeds.
How do I choose the right replacement tire size?
Read the size printed on the existing tire sidewall, then match that size and the valve type of the tube or rim. Also confirm clearance at the frame, fork, fenders, and motor hardware. Do not assume that a tire with a similar width will fit every electric bike.
What tools do I need to replace an electric bike tire?
Most tube-type jobs need two or three tire levers, a pump with a pressure gauge, and a matching replacement tube. An adjustable wrench or Allen set may be needed for the axle. While a torque wrench can help when the manufacturer's procedure specifies torque for axle or motor hardware.
How often should I replace my e-bike tires?
There is no universal replacement interval. Inspect the tread, casing, sidewalls, and rim regularly. Replace the tire when it shows significant wear or damage, or when repeated flats suggest deterioration. If a puncture caused the flat, inspect inside and outside the tire for glass or another embedded object before installing a tube. Portland's bike maintenance guide recommends checking tire pressure weekly.
Ready to Review Your Electric Bike Tire Replacement?
Correct tire sizing, valve compatibility, clearance, and installation details can be easier to confirm with hands-on guidance, especially when a hub motor or unfamiliar wheel setup is involved. If you ride in Bend or throughout Central Oregon, review your fit, tire, or repair questions with Voltaire Cycles of Central Oregon. Review electric bike repair and service options and choose the next step that fits your bike.